Panhard oil light piston developments
Friday 02 April 2004 Filed in: Panhard Oil
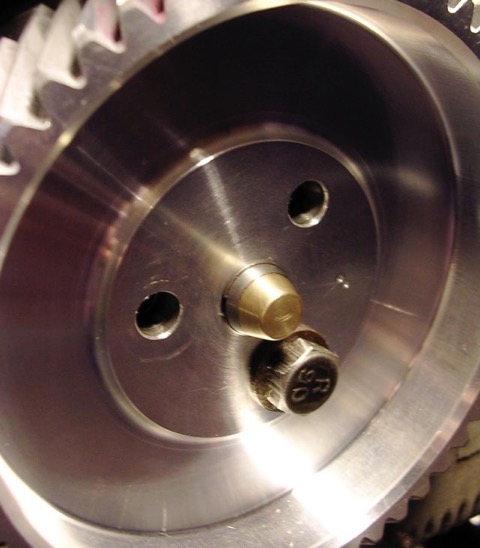
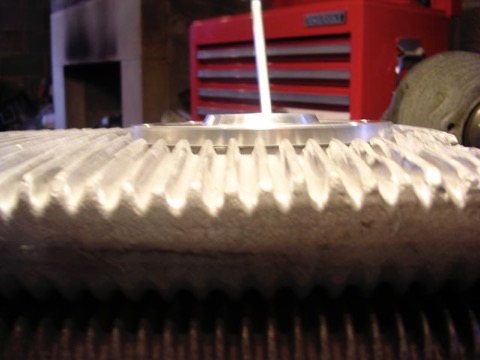
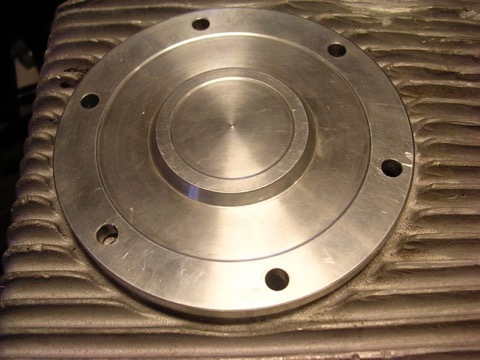
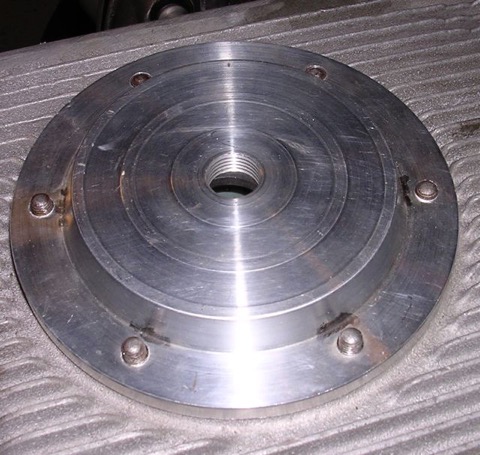
As part of my lubrication works I made some oil light pistons to replace the standard machined cast originals shown in the bottom picture.
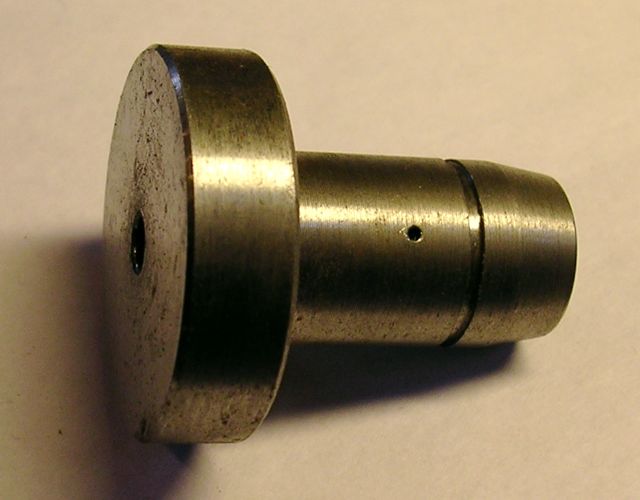
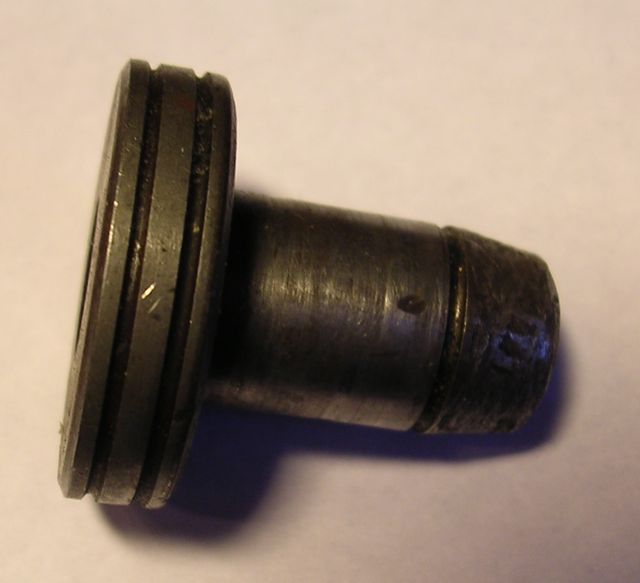
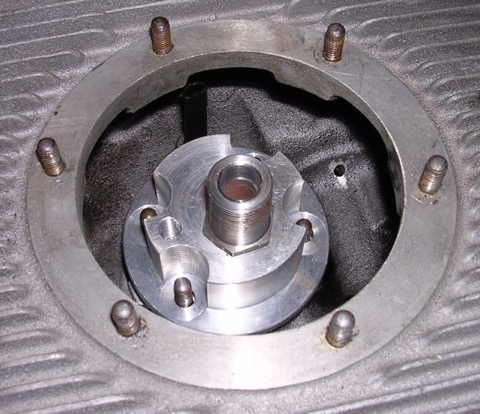
The original had a rounded tip, whereas mine had a threaded hole, which was part of the oil relief valve assembly, and I couldn’t really alter this unless I made a two part piston.
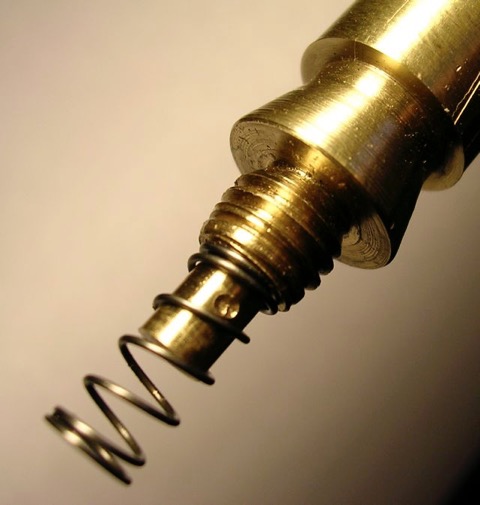
There was a concern that this nosing or tip, despite being rounded similar to the picture below …
… would still abrade the oil light wooden button, and cause problems further down the line. To negate this I started work on a one off two part oil light piston assembly.
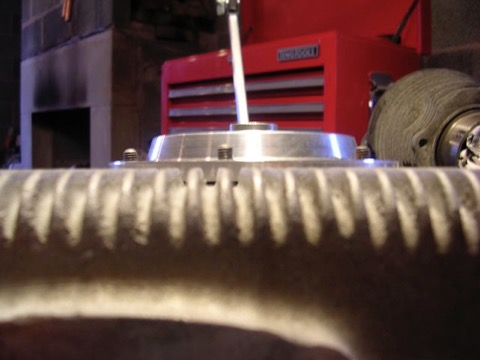
First I had to replace the set screw and create a guide for the relief valve spring. I made this part in brass using the lathe from a piece I had lying around that I was going to use to replace a missing foot off my favourite briefcase!
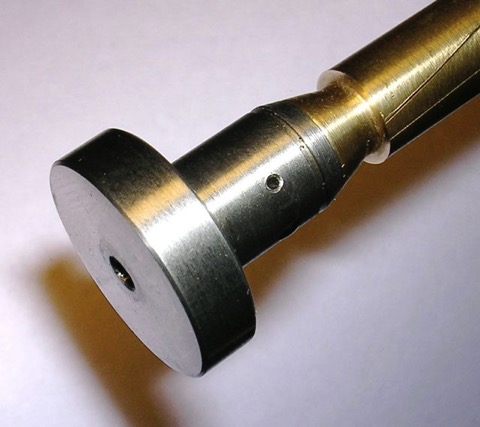
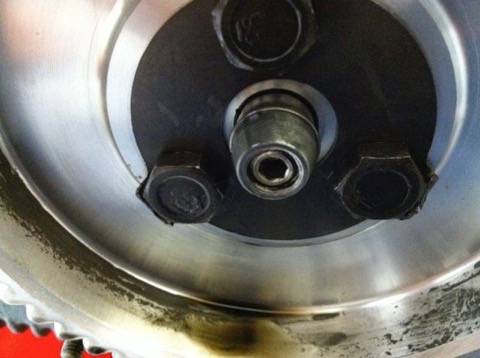
Then cut down a replacement oil light piston, and put them together, to look like this.
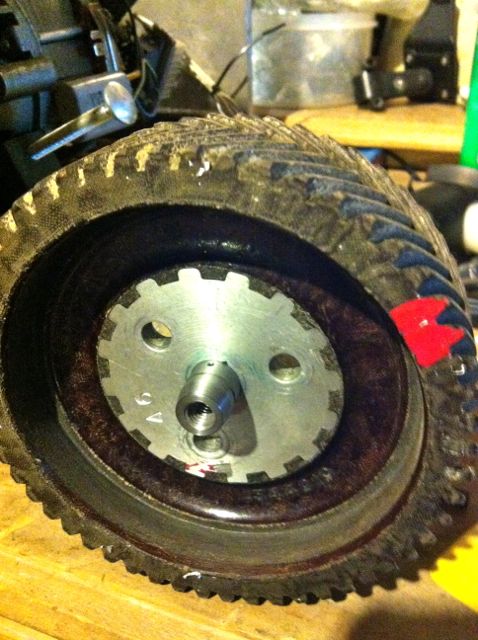
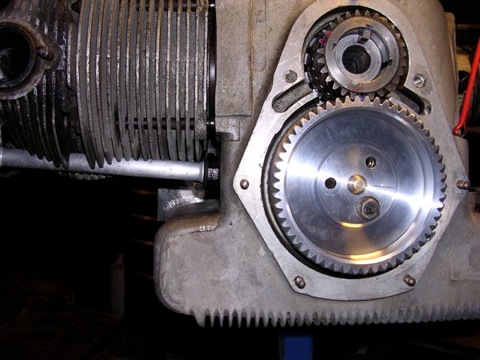
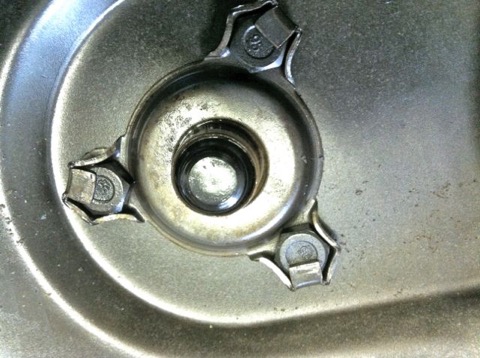
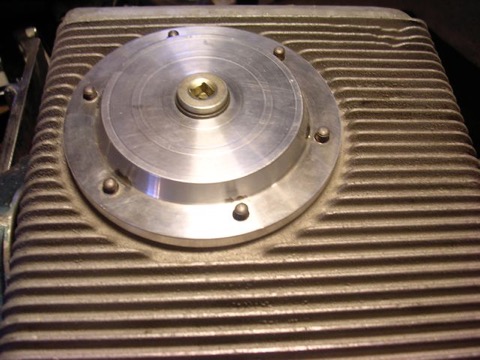
This was the finished product within the camshaft gear...
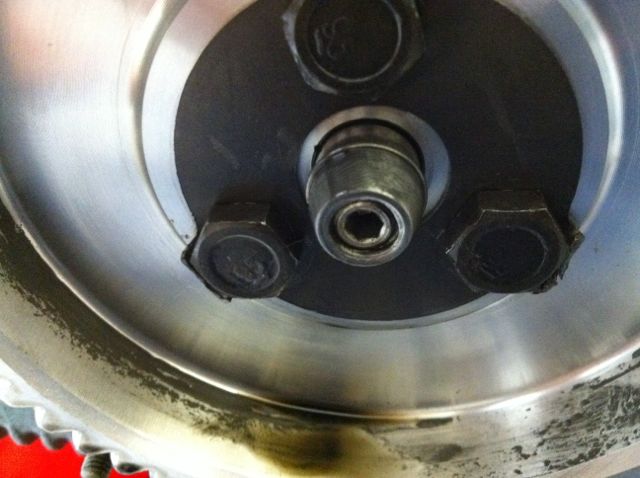
…and here is a close up.
UPDATE (2011) Link to this post
It turns out this wasn’t necessary, as upon examining another early engine, with this rounded oil light piston tip fitted there was no wear to the wooden block, so this work wasn’t required, but at least there is another option for those that don’t believe me.
The original had a rounded tip, whereas mine had a threaded hole, which was part of the oil relief valve assembly, and I couldn’t really alter this unless I made a two part piston.
There was a concern that this nosing or tip, despite being rounded similar to the picture below …
… would still abrade the oil light wooden button, and cause problems further down the line. To negate this I started work on a one off two part oil light piston assembly.
First I had to replace the set screw and create a guide for the relief valve spring. I made this part in brass using the lathe from a piece I had lying around that I was going to use to replace a missing foot off my favourite briefcase!
Then cut down a replacement oil light piston, and put them together, to look like this.
This was the finished product within the camshaft gear...
…and here is a close up.
UPDATE (2011) Link to this post
It turns out this wasn’t necessary, as upon examining another early engine, with this rounded oil light piston tip fitted there was no wear to the wooden block, so this work wasn’t required, but at least there is another option for those that don’t believe me.
Panhard double sump double pump oil filter
Wednesday 03 March 2004 Filed in: Panhard Oil
The existing Panhard oil filter mod I created works well at lowering the oil temperature, but there was a nagging doubt that all was not as good as it could be, because on a longer run the temperature would climb, but drop when the revs were dropped. It looked like an under capacity issue, and although you can add oil coolers, the Panhard race cars went to a double sump arrangement. This was an additional sump casting that attached to the existing and was held in place by longer studs.
To test this out, I would need to make a mod to my existing Panhard oil filter to accept a double pump, because just making a longer inlet an adding an external filter, would reduce the ground clearance, and possibly cause another issue when the filter got hit. In reality, a PL17 would be OK, but I decided to look at this further, especially when Ron Tyrrell offered a double sump casting and double pump for me to work with.
Eventually I used a variation of this internal filter, and a shortened oil pick up from the standard external oil filter kit, and made a new sump plate on the lathe. The slight bump in the middle was to centre the internal oil filter, when you attached the sump plate to the double sump.

The sump plate was substantially thinner, but the oil changing was going to be messy, because there was no drain plug fitted.
In conclusion, the new filter arrangement worked very well in Ron’s car, and oil temperatures were consistently lower at speed, and did not climb into the higher levels he had seen previously in motorway work. He is convinced the increase in capacity is the correct way to go, because if it was a flow rate issue, the oil temperatures would stay high. Unfortunately, double sump castings are rarely available, but anything you do to increase the oil capacity of these engines will be beneficial.
To test this out, I would need to make a mod to my existing Panhard oil filter to accept a double pump, because just making a longer inlet an adding an external filter, would reduce the ground clearance, and possibly cause another issue when the filter got hit. In reality, a PL17 would be OK, but I decided to look at this further, especially when Ron Tyrrell offered a double sump casting and double pump for me to work with.
Eventually I used a variation of this internal filter, and a shortened oil pick up from the standard external oil filter kit, and made a new sump plate on the lathe. The slight bump in the middle was to centre the internal oil filter, when you attached the sump plate to the double sump.
The sump plate was substantially thinner, but the oil changing was going to be messy, because there was no drain plug fitted.
In conclusion, the new filter arrangement worked very well in Ron’s car, and oil temperatures were consistently lower at speed, and did not climb into the higher levels he had seen previously in motorway work. He is convinced the increase in capacity is the correct way to go, because if it was a flow rate issue, the oil temperatures would stay high. Unfortunately, double sump castings are rarely available, but anything you do to increase the oil capacity of these engines will be beneficial.
Panhard internal filter vs external filter modifications
Sunday 22 February 2004 Filed in: Panhard Oil
I found these pictures in my iPhoto gallery, so I’d thought I’d update the records. These pictures are from the prototype internal filter versions I made.
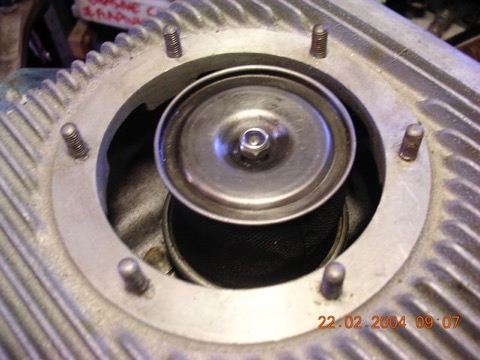
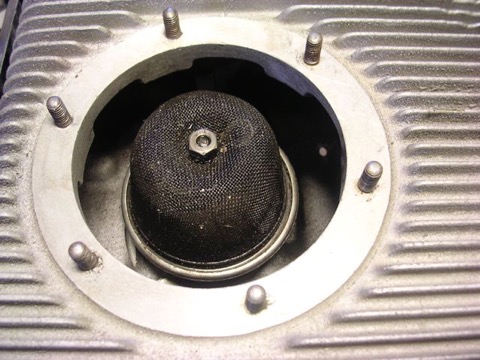
Standard filter arrangement with camera shake, showing standard crankcase sump below. The later cylindrical gauze screen is shown below, with the earlier tapered type underneath this.
This is my external oil filter conversion pictured below, but in order to reduce the ground clearance, it was decided to try and put the oil filter inside, which obviously makes oil changing potential awkward.
This is first attempt, which used an internal filter I had lying around, and it wasn’t really suitable, as the clearance would have been no better.
To make this fit, I had to revise the inlet pick up pipe, and I wasn’t that happy about the one way valve in the base of the filter either, or the depth of the raw aluminium billet to create a sump plate. This is the raw baseplate being checked for size. For economic reasons I didn’t want to deviate from my replacement oil filter kit too much, so I was always looking to minimise the changes needed.
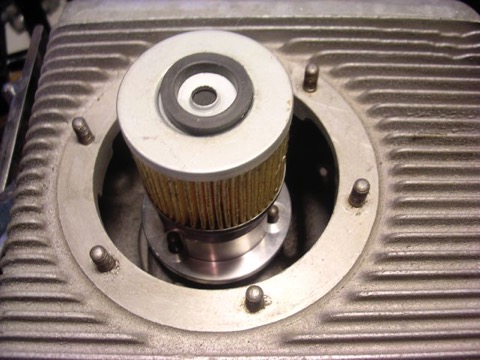
I managed to find a shallower filter, shown below and this fitted into the standard sump casting, but I haven’t machined the pick up pipe yet...
…and here is the complete assembly, essentially the revised internal filter set up, showing the new sump plate.

However, another session on the lathe produced this, and I just needed to find a drain plug...
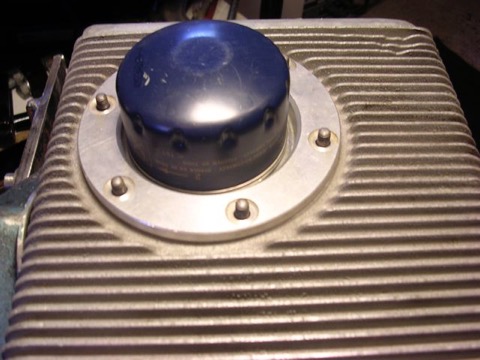
…which I did here, and the sump plate is substantially lower than the first version, but more practical and not as tall a fitting as my standard replacement filter cartridge, shown below (the blue one)

Standard filter arrangement with camera shake, showing standard crankcase sump below. The later cylindrical gauze screen is shown below, with the earlier tapered type underneath this.
This is my external oil filter conversion pictured below, but in order to reduce the ground clearance, it was decided to try and put the oil filter inside, which obviously makes oil changing potential awkward.
This is first attempt, which used an internal filter I had lying around, and it wasn’t really suitable, as the clearance would have been no better.
To make this fit, I had to revise the inlet pick up pipe, and I wasn’t that happy about the one way valve in the base of the filter either, or the depth of the raw aluminium billet to create a sump plate. This is the raw baseplate being checked for size. For economic reasons I didn’t want to deviate from my replacement oil filter kit too much, so I was always looking to minimise the changes needed.
I managed to find a shallower filter, shown below and this fitted into the standard sump casting, but I haven’t machined the pick up pipe yet...
…and here is the complete assembly, essentially the revised internal filter set up, showing the new sump plate.
However, another session on the lathe produced this, and I just needed to find a drain plug...
…which I did here, and the sump plate is substantially lower than the first version, but more practical and not as tall a fitting as my standard replacement filter cartridge, shown below (the blue one)