ABS Pump Stripdown
Mon 12 Feb 2007 Filed in: GTS1000 ABS
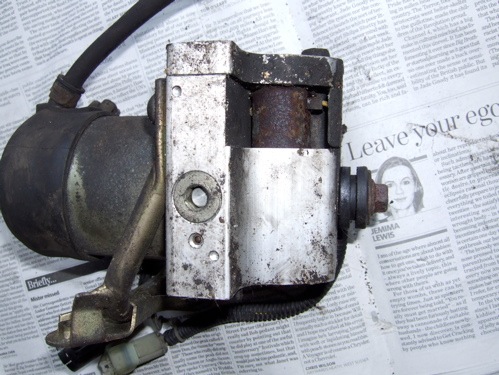
Just a progress report of my attempts to service that old unit in the loft.
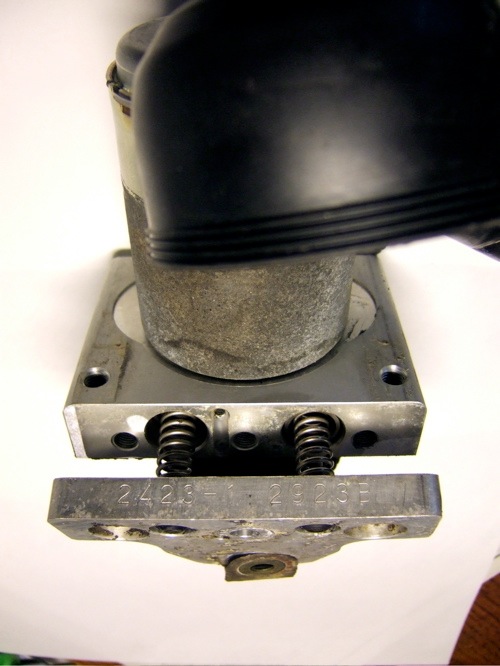
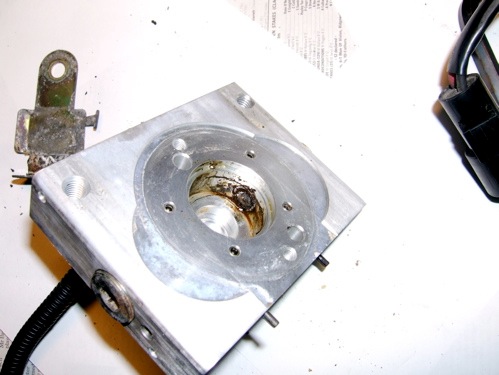
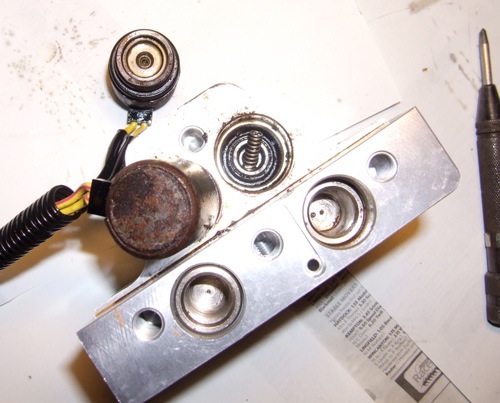
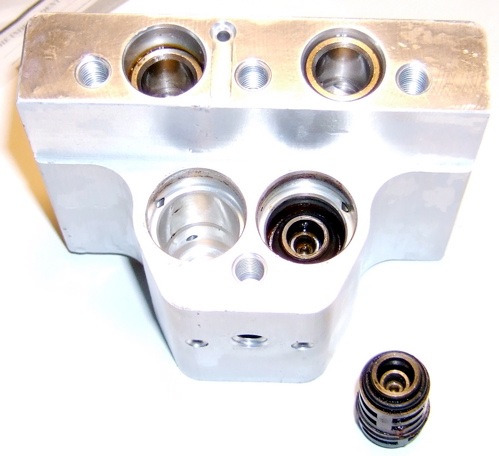
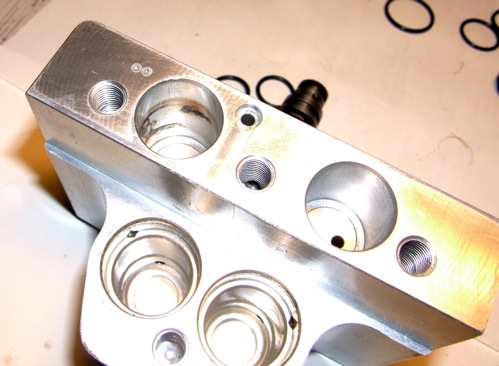
The easy bit undoing the plate
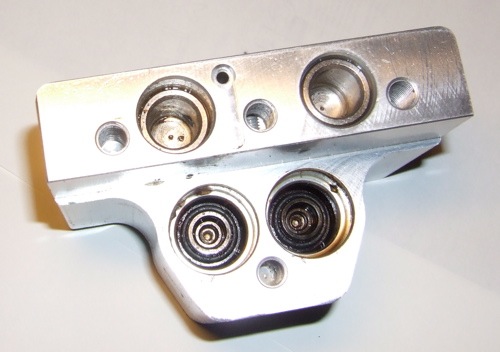
That piston shouldn't be like that, left = front, right = rear circuit
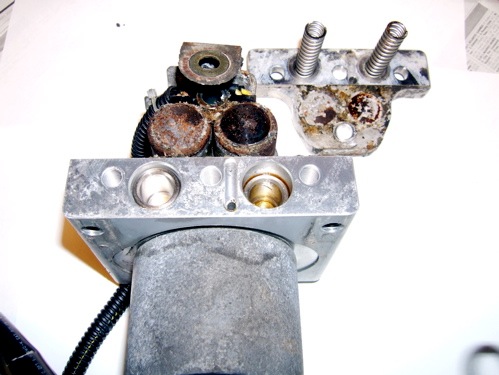
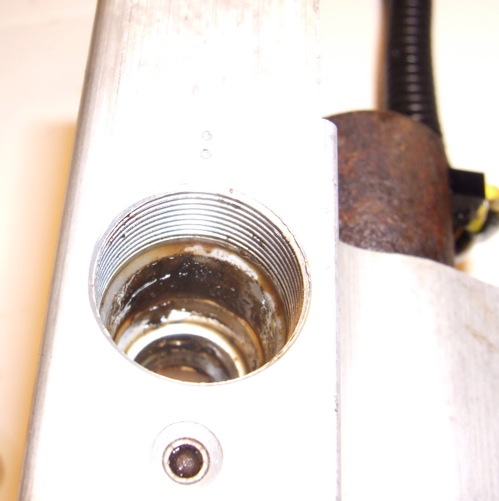
This hasn't worked in a while, the pump goes round, but no pressurised remote reservoir will kick in.
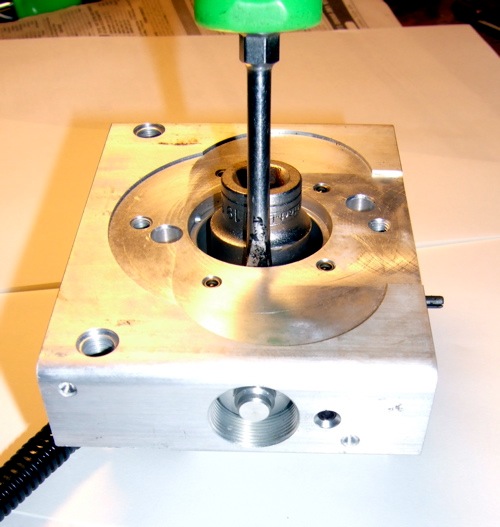
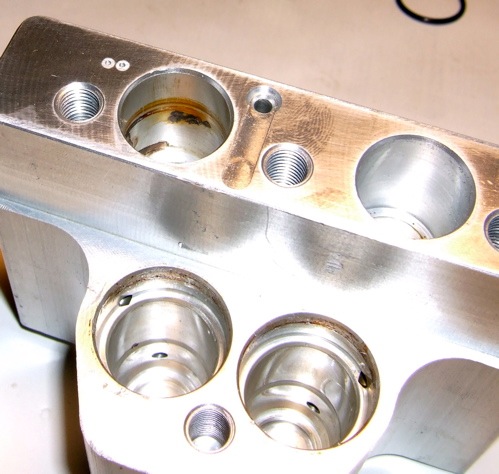
Neither has this side either. So after cleaning the surplus muck off, it was time to go in again, and remove the pump pistons. A nicely rounded 19mm 3/8" socket dropped into the cavity and using a small flat bladed screwdriver as a lever, I teased them out.
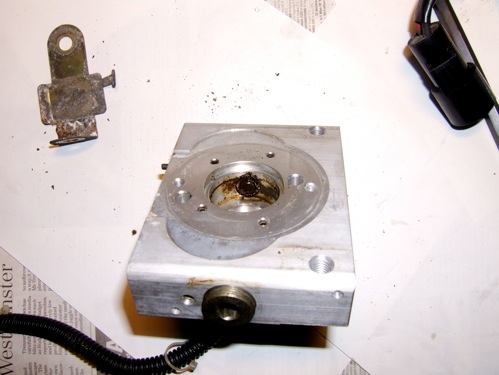
*TIP* I put the aluminium block in the oven for 10 minutes or so, which expands the aluminium and less so the steel components which gives the bores a little more clearance.
First piston is displaced and look how mucky it is, can't spell it out enough, you must renew the brake fluid regularly on ABS systems or else.
Obviously, you get the same result on the other side, but don't forget to mark the piston. I chose two pips, on the body and two for the unaffected area in the middle of the fastener
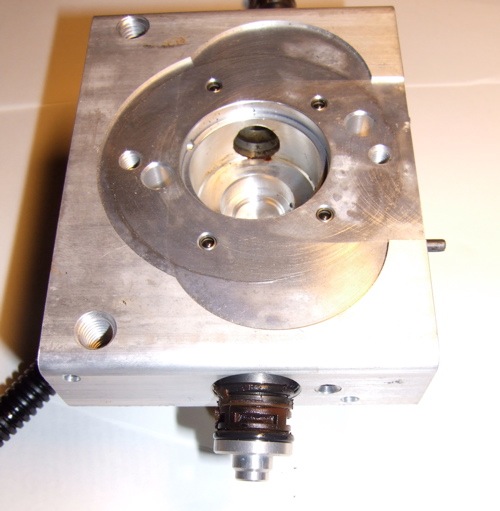
If there's muck on the piston they will be some in the bore and all the small holes too. This is the rear circuit piston bore.
Ditto for the front end

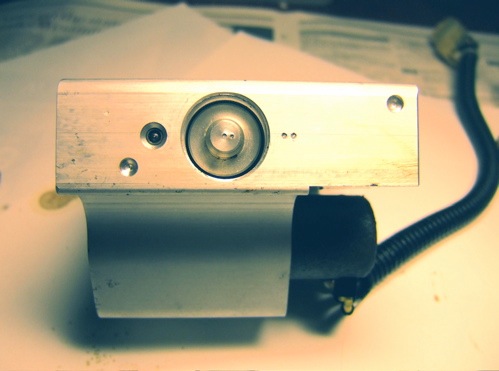
Solenoid removal, with heat and I didn't do it in time either, as the missus caught me.
My best efforts were after teasing with screwdrivers trying to rock them. I put them in the oven 120 deg C, 15 minutes after washing them, because it stinks of stale brake fluid, GT85, WD40 and caustic wash in my case.
Actually you can ignore the screwdrivers bit and just drive a small prybar into the base joint and then rock it out at the same time by applying pressure against the aluminium body. Actually worked rather well and no damage done.
Then it was time to repeat the operation. Mark the solenoids too, because although the wires are different, you don't really want to get it wrong at this stage do you. Might make for some interesting ABS action.
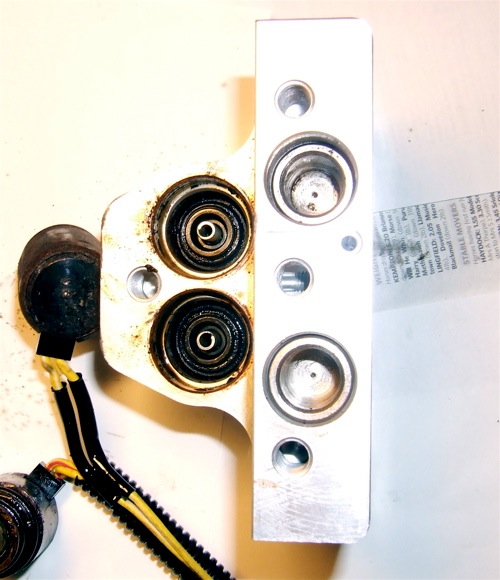
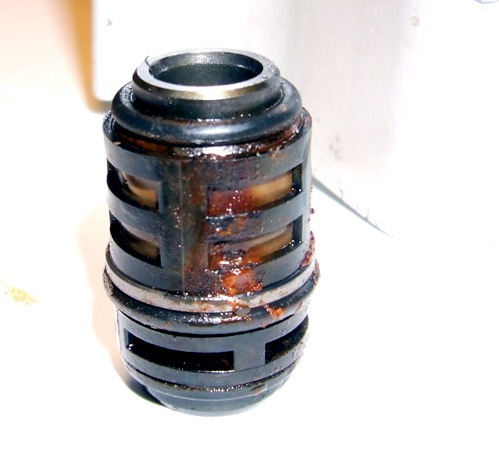
This where the work is at the moment, freeing these seized pump piston assemblies. The middle bit at the top, rubs against the electric motor cam, and this pressurises the remote reservoir for when brake application needs to be reapplied.
Make sure you mark the other parts too, because it might be some time before you get it together again.
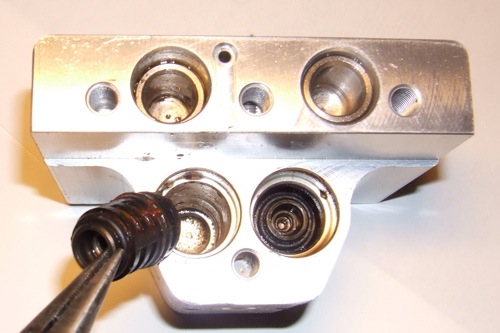
Under each solenoid is a piston assembly, with a one way valve. This is a little tricky to extract, although warmth and lube does help. I used a 1/4" drive socket, that was a snug fit, and waggled it in the middle part of the piston and rocked the piston assembly from side to side. A little lube, but it still wouldn't rotate, so I grabbed some needle pliers
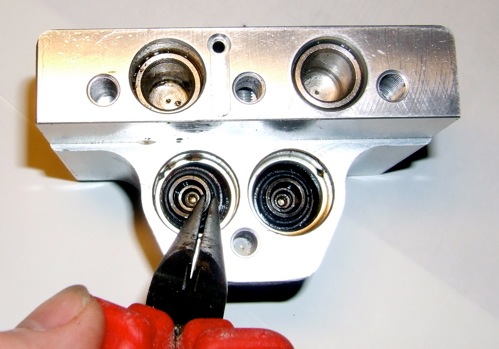
... and gradually teased it out. Notice the usual muck, please change your brake fluid regularly.
Better view of the solenoid piston assembly bore. Piston on the left.
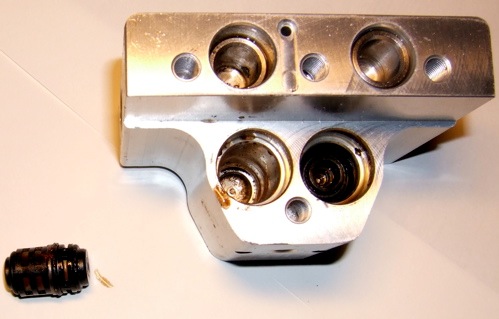
Look at the piston assembly, nice congealed brake fluid.
Another wash and clean the solenoid bore, looks better
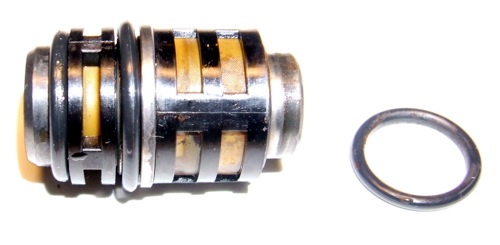
Give the solenoid piston assembly a wash too. O ring off already, couldn't wait to have a bath. If you warm the assembly in warm water, the filter gauze ring will pry off with your thumb nails.
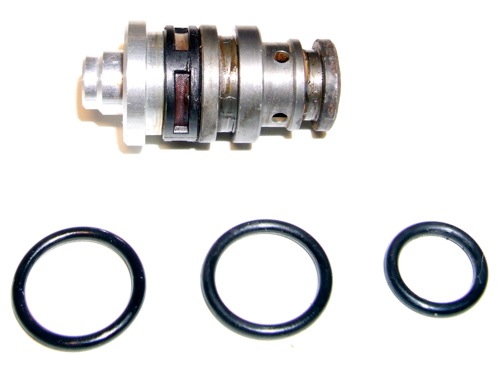
Getting closer to those O ring sizes. Front brake circuit from ABS piston assembly, just three O rings, but troublesome aluminium and steel assembly means I might have to fridge this in cling film to remove the aluminium cap. Then you'd warm the steel part to soften the filter/gauze ring
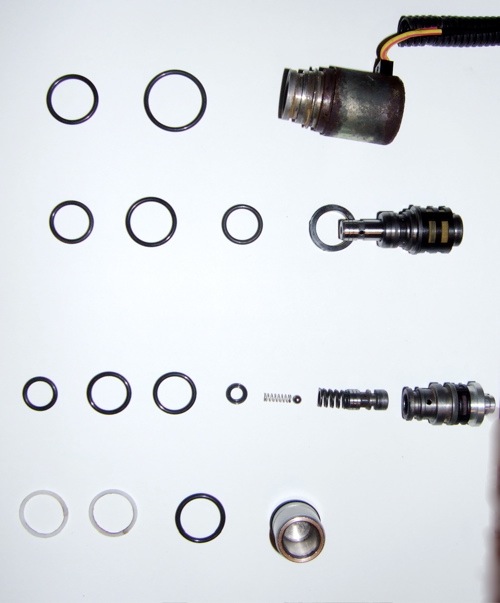
Finally most of the O rings, still there might be some more yet, and also there are two each per solenoid, that I have not taken picture of yet.
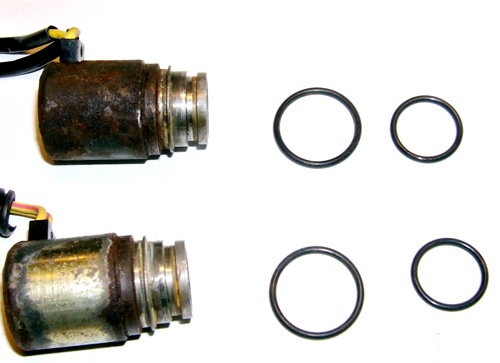
Solenoid O rings.
Final pictures for the evening, need to wrap a bit in cling film and put in freezer, and think about these seized pump pistons, soaking in WD40, Dinitrol etc seems the way to go and wait a little longer.
Solenoid piston assembly, from the rear this time, compare the difference with previous shot of front.
Same as above, but more disassembly, notice how much junk is under the gauze ring, needs an internal clean, and you wouldn't know I washed the outside before. This inner piston was slightly stuck, corroded at end, but managed to tap it out gently, using a 1/4" socket again.
Looks like I missed the sleep bus tonight, anyway more pictures.
Removed the pump reservoir pistons, (buffer pistons on USA site), body starting to look cleaner compared to first look.
Close up of the pump body, showing the corrosion to the pump reservoir bore (front circuit). The two pips are my markings, and notice the bore is deeper, it needs more volume for the six pot calliper (previous picture shows it better).
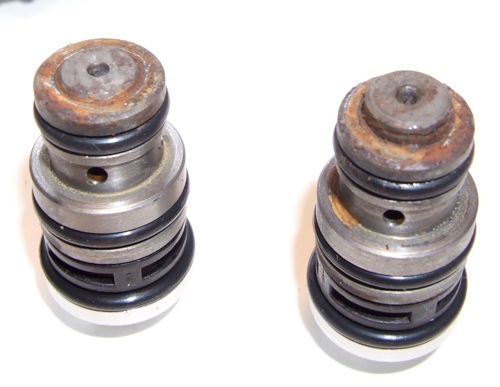
The pistons are unusual, they have two PTFE split rings to slide on...this is great except water gets in here I think, could do with an external O ring, but maybe it would have run dry and stuck?
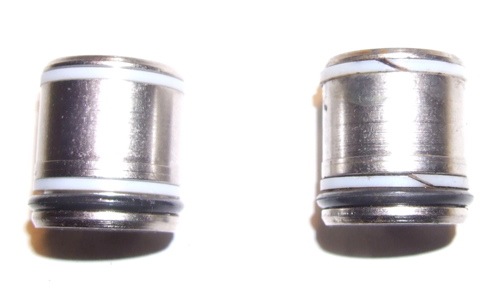
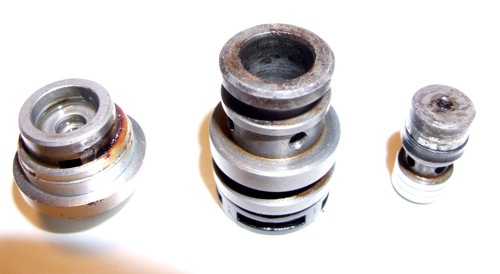
Look at the corrosion to the right piston, not so clever the material or machining either, as looks like stock brake piston gear, plated steel.
Good excuse to put some stainless in the lathe, would be a sensible fix.
More O rings too, takes the tally to 18 in total, as far as I remember.
After soaking both the corroded and seized looking inner pump pistons, I managed to get one free...unwisely I tapped it inwards with a soft plastic hammer, but very fortunately was able with a Snap On Pick Tool, get it out by teasing on the cross drillings.
This metal is hardened, I think so, but I was gentle and teased it out enough to trap in a soft steel 2" square edged hobby vice. A little bit of lube and some twisting, keeping the assembly sloping uphill, I released the spring pressure and sure enough, it's starting to look like Kevin Hawkin's pictures, but not as clean.
*TIP* So use a smooth faced vice and enough pressure to force it to twist.

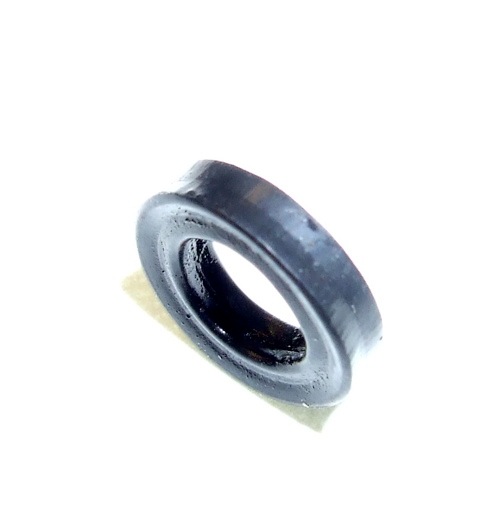
A close up of that mystery seal, which is not an O ring.
And the seal pulled off the inner piston.
Even closer views of the seal


There is still more work to do, as I have not been so lucky with the other side yet, and also there is another one way valve, ball and spring trapped under the left hand aluminium part, and you have to pull this off to clean the filter strainer gauze ring.
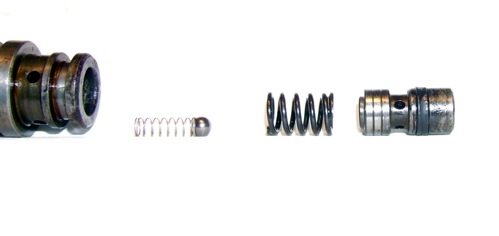
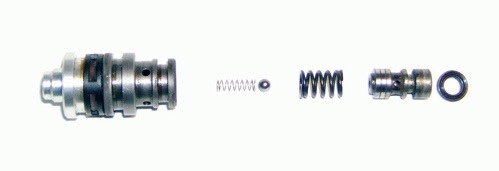
The start of a breakdown picture
*TIP* Don't underestimate the time it takes to sort out a seized inner pump piston

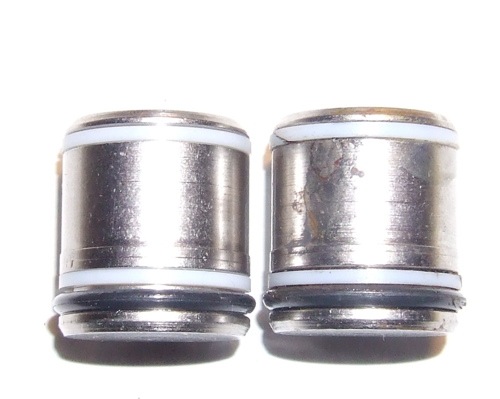
and 30 hours later or so, the same pistons, but the one on the right needed only 8 hours in a jam jar with a load of WD40...doesn't do the seal inside any good, so remove external O rings too.

This is definitely quite an interesting exercise, after more soaking in WD40, I was able to grip the inner piston in the small smooth jawed vice and twist it out. I caught the springs, and the small ball ... phew
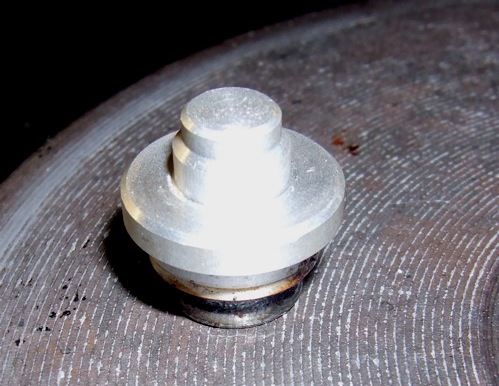
Next up was how to get the aluminium cap off. As I said before, I didn't twig from Kevin Hawkin's website about the steel cap...but I got it second time around.
The aluminium cap is stepped to locate on the screwed plug and also make room for the spring of the one way valve.
How to get this off, a soft drift, just less than 8mm diameter will drive it out, but be careful you don't want to send the aluminium cap into infinity and beyond. I gripped the outer body in the same small bench vice and two pieces of triangular section hardwood glazing bead. I wound the vice up tight, making sure I didn't trap the gauze strainer, a few light taps and bingo.
This was the left hand piston in the previous shots, and all it will take is a little heat on the cap to free the steel one way valve seat, which is incidentally well bunged up, if you can make out the slots. Interestingly by doing it this way, you stop the seat coming out of the aluminium cap and losing the ball and spring.
Another view of that pump seal for the inner piston.
*TIP* Heat is a great way to extract the aluminium cap and steel seat for the one way valve, and much faster for those that have to use the kitchen...about 60 seconds.
If the kitchen is out of bounds, you can buy a small electric hot plate from Argos (UK, catalogue shop) for about £20, well worth having in the tool cupboard. I use mine for crankshaft assembly normally. You can use a blow torch, but be careful too much heat will kill the springs, and electric is much more controllable.
However, place the aluminium cap on the hotplate, place a pyrex (heat proof glass) bowl over the top, and turn up the hotplate, 60 seconds later the heat on the different metals, causes the fit to loosen and the pressure of the spring forces the cap off, the spring bounces of the glass bowl and the ball stays on the steel seat.
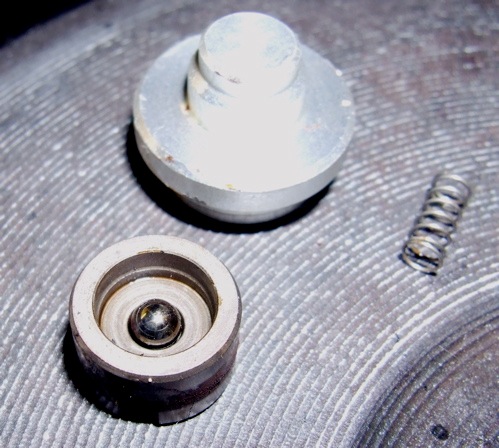
Note This picture was staged for the photo, the steel ball lives on the other side of the seat, and the fluid escapes via the two slots into the gauze filter ring
The easy bit undoing the plate
That piston shouldn't be like that, left = front, right = rear circuit
This hasn't worked in a while, the pump goes round, but no pressurised remote reservoir will kick in.
Neither has this side either. So after cleaning the surplus muck off, it was time to go in again, and remove the pump pistons. A nicely rounded 19mm 3/8" socket dropped into the cavity and using a small flat bladed screwdriver as a lever, I teased them out.
*TIP* I put the aluminium block in the oven for 10 minutes or so, which expands the aluminium and less so the steel components which gives the bores a little more clearance.
First piston is displaced and look how mucky it is, can't spell it out enough, you must renew the brake fluid regularly on ABS systems or else.
Obviously, you get the same result on the other side, but don't forget to mark the piston. I chose two pips, on the body and two for the unaffected area in the middle of the fastener
If there's muck on the piston they will be some in the bore and all the small holes too. This is the rear circuit piston bore.
Ditto for the front end
Solenoid removal, with heat and I didn't do it in time either, as the missus caught me.
My best efforts were after teasing with screwdrivers trying to rock them. I put them in the oven 120 deg C, 15 minutes after washing them, because it stinks of stale brake fluid, GT85, WD40 and caustic wash in my case.
Actually you can ignore the screwdrivers bit and just drive a small prybar into the base joint and then rock it out at the same time by applying pressure against the aluminium body. Actually worked rather well and no damage done.
Then it was time to repeat the operation. Mark the solenoids too, because although the wires are different, you don't really want to get it wrong at this stage do you. Might make for some interesting ABS action.
This where the work is at the moment, freeing these seized pump piston assemblies. The middle bit at the top, rubs against the electric motor cam, and this pressurises the remote reservoir for when brake application needs to be reapplied.
Make sure you mark the other parts too, because it might be some time before you get it together again.
Under each solenoid is a piston assembly, with a one way valve. This is a little tricky to extract, although warmth and lube does help. I used a 1/4" drive socket, that was a snug fit, and waggled it in the middle part of the piston and rocked the piston assembly from side to side. A little lube, but it still wouldn't rotate, so I grabbed some needle pliers
... and gradually teased it out. Notice the usual muck, please change your brake fluid regularly.
Better view of the solenoid piston assembly bore. Piston on the left.
Look at the piston assembly, nice congealed brake fluid.
Another wash and clean the solenoid bore, looks better
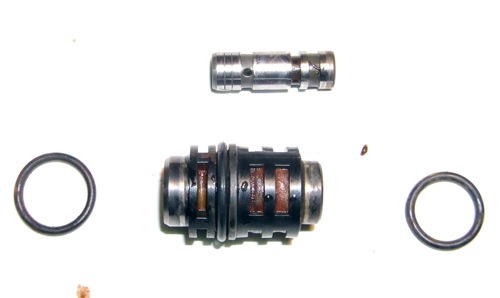
Give the solenoid piston assembly a wash too. O ring off already, couldn't wait to have a bath. If you warm the assembly in warm water, the filter gauze ring will pry off with your thumb nails.
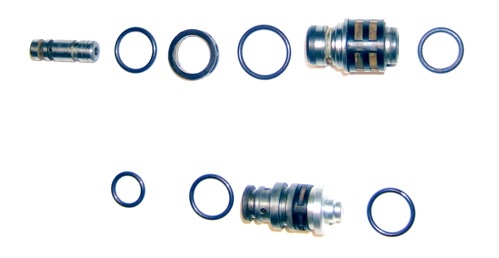
Getting closer to those O ring sizes. Front brake circuit from ABS piston assembly, just three O rings, but troublesome aluminium and steel assembly means I might have to fridge this in cling film to remove the aluminium cap. Then you'd warm the steel part to soften the filter/gauze ring
Finally most of the O rings, still there might be some more yet, and also there are two each per solenoid, that I have not taken picture of yet.
Solenoid O rings.
Final pictures for the evening, need to wrap a bit in cling film and put in freezer, and think about these seized pump pistons, soaking in WD40, Dinitrol etc seems the way to go and wait a little longer.
Solenoid piston assembly, from the rear this time, compare the difference with previous shot of front.
Same as above, but more disassembly, notice how much junk is under the gauze ring, needs an internal clean, and you wouldn't know I washed the outside before. This inner piston was slightly stuck, corroded at end, but managed to tap it out gently, using a 1/4" socket again.
Looks like I missed the sleep bus tonight, anyway more pictures.
Removed the pump reservoir pistons, (buffer pistons on USA site), body starting to look cleaner compared to first look.
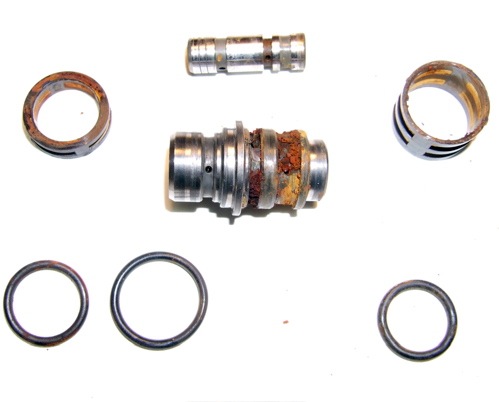
Close up of the pump body, showing the corrosion to the pump reservoir bore (front circuit). The two pips are my markings, and notice the bore is deeper, it needs more volume for the six pot calliper (previous picture shows it better).
The pistons are unusual, they have two PTFE split rings to slide on...this is great except water gets in here I think, could do with an external O ring, but maybe it would have run dry and stuck?
Look at the corrosion to the right piston, not so clever the material or machining either, as looks like stock brake piston gear, plated steel.
Good excuse to put some stainless in the lathe, would be a sensible fix.
More O rings too, takes the tally to 18 in total, as far as I remember.
After soaking both the corroded and seized looking inner pump pistons, I managed to get one free...unwisely I tapped it inwards with a soft plastic hammer, but very fortunately was able with a Snap On Pick Tool, get it out by teasing on the cross drillings.
This metal is hardened, I think so, but I was gentle and teased it out enough to trap in a soft steel 2" square edged hobby vice. A little bit of lube and some twisting, keeping the assembly sloping uphill, I released the spring pressure and sure enough, it's starting to look like Kevin Hawkin's pictures, but not as clean.
*TIP* So use a smooth faced vice and enough pressure to force it to twist.
A close up of that mystery seal, which is not an O ring.
And the seal pulled off the inner piston.
Even closer views of the seal
There is still more work to do, as I have not been so lucky with the other side yet, and also there is another one way valve, ball and spring trapped under the left hand aluminium part, and you have to pull this off to clean the filter strainer gauze ring.
The start of a breakdown picture
*TIP* Don't underestimate the time it takes to sort out a seized inner pump piston
and 30 hours later or so, the same pistons, but the one on the right needed only 8 hours in a jam jar with a load of WD40...doesn't do the seal inside any good, so remove external O rings too.
This is definitely quite an interesting exercise, after more soaking in WD40, I was able to grip the inner piston in the small smooth jawed vice and twist it out. I caught the springs, and the small ball ... phew
Next up was how to get the aluminium cap off. As I said before, I didn't twig from Kevin Hawkin's website about the steel cap...but I got it second time around.
The aluminium cap is stepped to locate on the screwed plug and also make room for the spring of the one way valve.
How to get this off, a soft drift, just less than 8mm diameter will drive it out, but be careful you don't want to send the aluminium cap into infinity and beyond. I gripped the outer body in the same small bench vice and two pieces of triangular section hardwood glazing bead. I wound the vice up tight, making sure I didn't trap the gauze strainer, a few light taps and bingo.
This was the left hand piston in the previous shots, and all it will take is a little heat on the cap to free the steel one way valve seat, which is incidentally well bunged up, if you can make out the slots. Interestingly by doing it this way, you stop the seat coming out of the aluminium cap and losing the ball and spring.
Another view of that pump seal for the inner piston.
*TIP* Heat is a great way to extract the aluminium cap and steel seat for the one way valve, and much faster for those that have to use the kitchen...about 60 seconds.
If the kitchen is out of bounds, you can buy a small electric hot plate from Argos (UK, catalogue shop) for about £20, well worth having in the tool cupboard. I use mine for crankshaft assembly normally. You can use a blow torch, but be careful too much heat will kill the springs, and electric is much more controllable.
However, place the aluminium cap on the hotplate, place a pyrex (heat proof glass) bowl over the top, and turn up the hotplate, 60 seconds later the heat on the different metals, causes the fit to loosen and the pressure of the spring forces the cap off, the spring bounces of the glass bowl and the ball stays on the steel seat.
Note This picture was staged for the photo, the steel ball lives on the other side of the seat, and the fluid escapes via the two slots into the gauze filter ring
blog comments powered by Disqus
